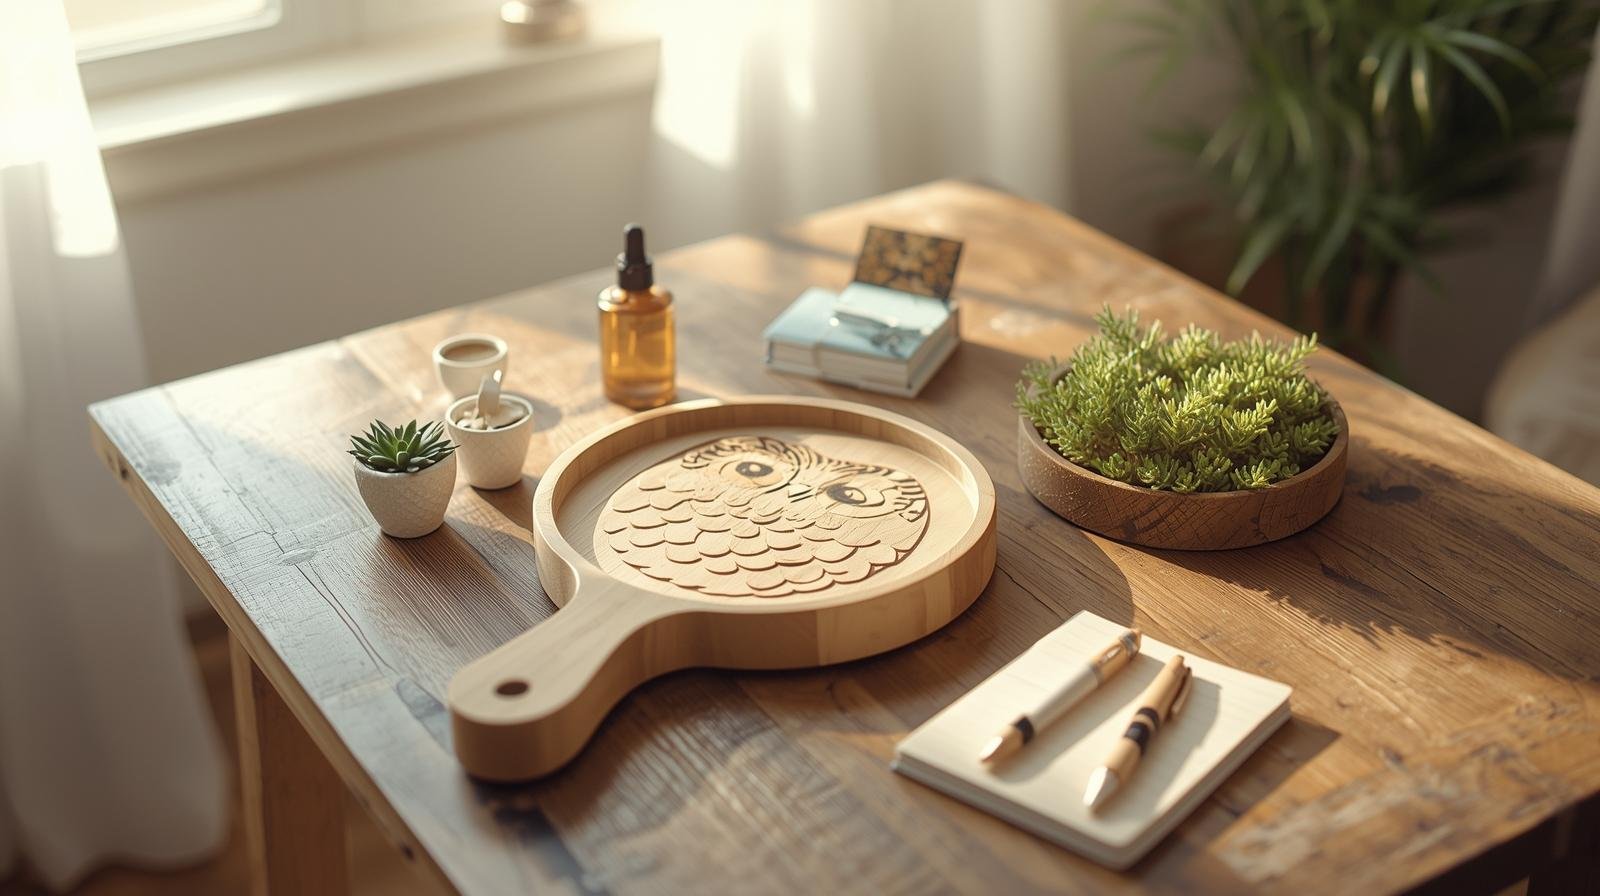
For this project I thought I would combine my love for owls and clay together and make a sweet little tray. I love having these little catchall trays around the house. They are perfect for change, rings, keys etc.
They are so easy to make and you can create pretty much anything you like as long as you keep the shapes basic and not too complicated.
What you will need:
Air drying clay
Rolling pin
Parchment paper (to line work surface)
Toothpick or any fine tip marking tool
Sharp blade knife
Water
Bowl
Straw
Plastic wrap
Paint (optional)
Gloss sealer (optional)
Lay your work on a parchment paper covered surface and roll out with a rolling pin.
Draw out the basic shape of an owl as shown
Use a small round object to make the eyes (I used a bottle top).
With a toothpick, mark the beak by drawing an upside down triangle.
Holding a straw on an angle, make little indentations as shown.
Continue this process overlapping as shown
With a sharp knife, carefully cut around your drawing.
Dip your index finger in water, and gently smooth out all the rough edges. Allow to dry for 24 hours. Gently sand the edges.
You can paint if desired and once dry, apply a layer of sealer.
I decided to add a touch of gold paint to the outlines just so they would be a little more noticeable.
Super easy right? These are not only practical but adorable to look at.